
Deni Ice Cream Maker: A Comprehensive Manual Guide
Welcome! This detailed guide unlocks the full potential of your Deni ice cream maker, offering simple instructions for delightful, homemade frozen treats.
Explore effortless recipes, maintenance tips, and troubleshooting advice, ensuring years of creamy, delicious enjoyment with your new kitchen companion.
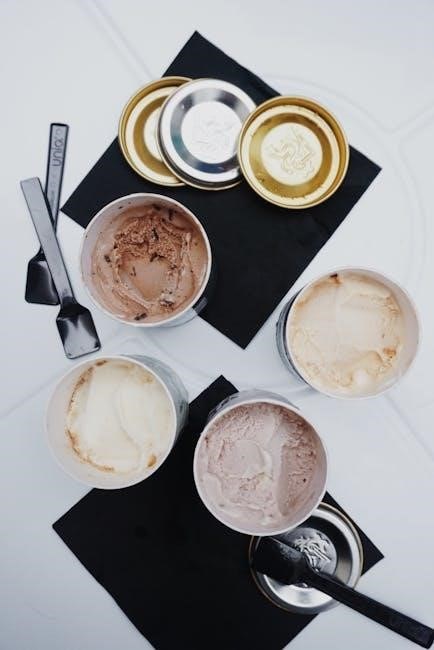
Discover how to create palate-pleasing ice cream, sorbet, and frozen yogurt, bringing the joy of dessert-on-demand directly to your home.
Deni ice cream makers represent a fantastic entry point into the world of homemade frozen desserts, offering convenience and affordability without sacrificing quality. These machines, as highlighted in recent reviews, are designed to transform simple ingredients into delectable treats like ice cream, sorbet, and frozen yogurt, bringing a touch of summer joy to your kitchen year-round.
The appeal of a Deni machine lies in its user-friendly operation. Unlike more complex systems, Deni models generally require minimal assembly and offer a straightforward process – mix ingredients, pre-freeze the bowl, assemble, and churn! This simplicity makes them ideal for both novice cooks and experienced dessert enthusiasts.
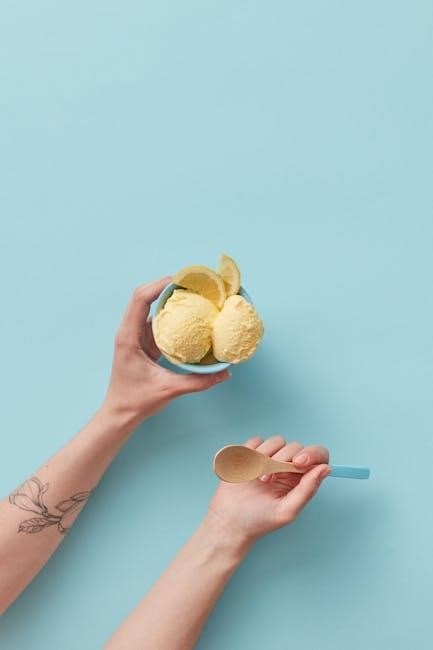
Modern home ice cream makers, like those from Deni, are akin to having “dessert on demand,” allowing you to create customized flavors and textures tailored to your preferences. They eliminate the need for store-bought options filled with artificial ingredients, empowering you to control the quality and freshness of your frozen delights.
Understanding Your Deni Model
Deni ice cream makers come in various configurations, but most share core features. Typically, a Deni model features a motor base, a double-walled freezer bowl, and a dasher – the component responsible for churning. Understanding these parts is crucial for optimal performance.
Many Deni machines boast a powerful motor, often around 40 watts, ensuring efficient churning and consistent results. The freezer bowl requires pre-freezing for a significant period (usually 8-24 hours) to achieve the necessary temperature for freezing the ice cream mixture.
Some models are fully automatic, simplifying the process, while others may require more manual intervention; Familiarize yourself with the specific controls and settings of your Deni model before first use. Refer to the included diagrams for proper part identification and assembly. Knowing your machine’s capacity (typically 1-1.5 quarts) will also help with recipe scaling.
Key Components and Parts Identification
Let’s identify the essential parts of your Deni ice cream maker. The Motor Base houses the churning mechanism and provides the power. The Freezer Bowl, a double-walled container, is where the freezing happens – it must be fully frozen before use.
The Dasher, often comprised of blades and paddles, continuously mixes and aerates the ice cream base as it freezes, creating a smooth texture. A Lid with an opening for adding mix-ins is standard, preventing splattering during operation.
Some models include a Measuring Cup and Recipe Booklet for convenience. Ensure all parts are present and undamaged before proceeding. Familiarize yourself with how each component connects and functions. Proper assembly is vital for safe and effective operation. Refer to the exploded diagram in your manual for a visual guide to each part’s location and purpose.
Preparing for First Use: Cleaning and Initial Setup
Before your inaugural batch, thorough cleaning is essential. Wash the freezer bowl, dasher, and lid with warm, soapy water. Rinse completely and dry with a soft cloth. Never use abrasive cleaners, as they can damage the surfaces.
The motor base should be wiped clean with a damp cloth only – do not immerse it in water. Once dry, ensure all parts are fully assembled according to the diagram. It’s crucial to pre-freeze the freezer bowl for at least 24 hours before making ice cream.
Confirm the bowl is level in your freezer for even freezing. A fully frozen bowl is the key to successful ice cream making. Test by shaking – if there’s liquid sloshing, it needs more time. Now you’re ready to embark on your homemade ice cream journey!
Making Your First Batch of Ice Cream
Let’s begin! Prepare your favorite recipe, ensuring ingredients are well-chilled for optimal results, and get ready for a delightful homemade experience.
Ingredient Selection and Recipes
Crafting the Perfect Flavor: The foundation of exceptional ice cream lies in quality ingredients. Begin with fresh, heavy cream – the higher the fat content, the richer the texture. Whole milk provides balance, while sugar sweetens and influences freezing point. Don’t underestimate the power of vanilla extract; it enhances other flavors beautifully.
Recipe Inspiration: For a classic vanilla, combine 2 cups heavy cream, 1 cup whole milk, ¾ cup sugar, and 2 teaspoons vanilla extract. Chocolate lovers can add ½ cup cocoa powder. Fruit-based options require purees or finely chopped pieces. Remember, pre-chilling ingredients is key!
Experimentation Encouraged: Feel free to explore! Add mix-ins like chocolate chips, nuts, or cookies after the initial churn. Consider using different extracts (almond, peppermint) or spices (cinnamon, nutmeg) to create unique flavor profiles. The possibilities are endless, allowing you to tailor each batch to your preferences.
Pre-Freezing the Bowl: Crucial Steps
Achieving Optimal Coldness: The Deni ice cream maker’s bowl requires thorough pre-freezing for successful ice cream creation. This is arguably the most critical step! Ensure your freezer is set to its coldest setting and the bowl is completely dry before placing it inside.
Freezing Duration: Allow a minimum of 16-24 hours for complete freezing. Insufficient freezing results in a soupy, rather than creamy, consistency. A fully frozen bowl will feel exceptionally cold to the touch. Avoid interruptions during this period.
Verification & Handling: Before assembly, check for ice crystals forming on the bowl’s exterior – a good indicator of readiness. Handle the frozen bowl with care, using oven mitts or a towel to prevent frostbite. A properly frozen bowl is the key to delicious, homemade ice cream!
Assembling the Ice Cream Maker

Step-by-Step Assembly: Begin by carefully removing the thoroughly frozen bowl from the freezer. Place the bowl securely within the Deni ice cream maker’s base, ensuring it sits flush and stable. Next, insert the dasher – the paddle-like component – into the center of the bowl.
Securing the Dasher: The dasher should fit snugly, connecting to the motor via the provided drive mechanism. Double-check that the dasher is properly locked in place; this is vital for effective churning. A loose dasher won’t create the desired texture.
Attaching the Motor Unit: Finally, carefully position the motor unit onto the base, aligning it with the dasher’s connection point. Ensure a secure fit. Your Deni ice cream maker is now assembled and ready for the delicious process of ice cream creation!
Operation and Functionality
Effortless Operation: The Deni ice cream maker simplifies frozen dessert creation, offering a user-friendly experience with consistent results and minimal effort.
Enjoy homemade treats with ease, thanks to its intuitive design and powerful motor, delivering delightful textures every time.

Step-by-Step Ice Cream Making Process
Preparation is Key: Begin by ensuring your Deni ice cream maker’s bowl is thoroughly pre-frozen – a minimum of 24 hours is recommended for optimal results. While the bowl chills, prepare your chosen ice cream mixture according to your recipe.
Assembly Time: Once the bowl is frozen solid, carefully assemble the ice cream maker. Attach the dasher to the motor base, then securely place the pre-frozen bowl onto the unit. Ensure everything clicks into place for stable operation.
Churning Begins: Pour your ice cream mixture into the frozen bowl, being careful not to exceed the maximum fill line. Power on the machine and allow it to churn for the recommended time – typically 20-30 minutes.
Monitoring Consistency: Observe the mixture as it transforms into ice cream. The consistency will thicken gradually. Add mix-ins during the final minutes of churning for even distribution.
Enjoy! Once the desired consistency is reached, power off the machine and scoop out your freshly made ice cream immediately.
Churning Time and Consistency
Optimal Churning Duration: Generally, the Deni ice cream maker requires between 20 to 30 minutes of churning to achieve a desirable ice cream consistency. However, this timeframe can vary based on the recipe, ambient temperature, and the pre-frozen state of the bowl.
Monitoring the Process: Regularly observe the mixture during churning. Initially, it will be liquid, then gradually thicken as ice crystals form. The mixture should transform into a soft-serve consistency.
Achieving Firmness: For a firmer texture, continue churning for a few extra minutes. Be cautious not to over-churn, as this can result in a grainy or buttery consistency.

Consistency Indicators: A properly churned batch will pull away from the sides of the bowl and the dasher will move with increasing resistance.
Recipe Specifics: Always refer to your recipe for specific churning time recommendations, as some mixtures may require longer or shorter durations.
Adding Mix-Ins: Timing and Techniques
Optimal Timing: Introduce mix-ins – such as chocolate chips, nuts, fruit pieces, or cookie dough – during the last 5 to 10 minutes of the churning process. Adding them too early can cause them to become pulverized or sink to the bottom.
Gentle Incorporation: Slowly pour or sprinkle the mix-ins into the ice cream maker while it’s still running. Avoid adding large quantities at once, as this can strain the motor.
Even Distribution: Allow the machine to run for a few more minutes to ensure the mix-ins are evenly distributed throughout the ice cream.
Mix-In Preparation: Ensure any frozen fruit or hard candies are chopped into small, manageable pieces to prevent damage to the machine.
Quantity Control: Generally, use no more than 1 to 1.5 cups of mix-ins per quart of ice cream base for optimal texture and flavor balance.
Maintenance and Troubleshooting
Keep it pristine! Regular cleaning and prompt attention to issues ensure your Deni ice cream maker delivers consistently delicious results for years to come.
Discover simple solutions for common problems, like ice cream not freezing, and maintain peak performance with our expert guidance.
Cleaning Procedures After Each Use
Immediate attention is key! After each delightful batch, disassemble your Deni ice cream maker promptly. Begin by unplugging the unit and removing the freezing bowl. Never immerse the motor base in water; instead, wipe it down with a damp cloth.
The freezing bowl, paddle, and lid are typically dishwasher-safe (top rack recommended), but hand washing with warm, soapy water is also effective. Ensure all components are thoroughly rinsed and dried before reassembly.
Pay close attention to the paddle, ensuring no ice cream residue remains in crevices. For stubborn residue, a soft brush can be helpful; Avoid abrasive cleaners, as they may damage the surfaces.
Proper cleaning prevents bacterial growth and ensures optimal performance for future batches. A clean machine equals a happy, flavorful experience!
Regularly inspect the components for any signs of wear or damage.
Troubleshooting Common Issues (e.g., Ice Cream Not Freezing)
Ice cream not freezing? First, verify the freezing bowl was pre-frozen for the recommended 24 hours, achieving a completely frozen state. Ensure the bowl is level during operation. Insufficient chilling is the most frequent culprit.
Check that the paddle is securely attached and rotating properly. A loose paddle won’t effectively churn the mixture. Confirm the mixture isn’t too warm; it should be thoroughly chilled before adding it to the machine.
Overfilling the bowl can also hinder freezing. Adhere to the maximum fill line. If the motor seems strained, unplug the unit and allow it to rest before restarting.
If issues persist, consult the full manual or contact Deni customer support. Remember, a little patience and attention to detail can resolve most problems!
Always prioritize safety and unplug the machine before any inspection.
Long-Term Storage and Care
Proper storage extends your Deni ice cream maker’s lifespan. After each use, ensure all parts are thoroughly cleaned and completely dry before storing. The freezing bowl requires special attention; avoid temperature shocks.
Store the bowl separately in a freezer-safe bag to prevent odor absorption. Keep the motor unit in a cool, dry place, away from direct sunlight and moisture. Avoid stacking heavy items on top of the machine.
For extended periods of non-use, consider disassembling the paddle and storing it individually. Regularly inspect the power cord for any signs of damage.
Never immerse the motor unit in water. Gentle cleaning with a damp cloth is sufficient. Following these guidelines ensures years of delicious homemade treats!
Refer to the full manual for detailed cleaning instructions and warranty information.
Advanced Techniques & Recipes
Elevate your creations! Explore sorbet, frozen yogurt, and custom flavors with your Deni maker, achieving perfect texture through experimentation and refined recipes.
Making Sorbet and Frozen Yogurt
Expanding Your Frozen Dessert Repertoire: Your Deni ice cream maker isn’t limited to traditional ice cream! It excels at crafting refreshing sorbets and tangy frozen yogurts, offering lighter alternatives for warm days. For sorbet, focus on fruit purees, sugar, and a touch of lemon juice – avoid dairy entirely. Pre-freeze the mixture thoroughly for optimal results, as sorbet tends to remain softer than ice cream.
Frozen yogurt requires a base of yogurt (Greek yogurt provides a thicker consistency), sugar, and flavorings. Adjust the sugar content based on the yogurt’s tartness. The churning process for both sorbet and frozen yogurt is similar to ice cream, but monitor the consistency closely. They generally require less churning time. Remember, these frozen delights are perfect for those seeking a healthier, yet equally satisfying, treat!
Creating Custom Flavors
Unleash Your Inner Ice Cream Artisan: The true magic of a Deni ice cream maker lies in its ability to facilitate endless flavor combinations! Don’t be afraid to experiment beyond classic vanilla or chocolate. Infuse your base with spices like cinnamon or cardamom, or incorporate extracts like almond or peppermint.
For bolder flavors, consider adding fruit purees, melted chocolate, or even coffee concentrate. When adding mix-ins, timing is key – introduce them during the last few minutes of churning to prevent them from becoming overly crushed. Remember to balance sweetness and acidity for a harmonious taste. Explore unique combinations like lavender honey, salted caramel, or pistachio rosewater. Your Deni maker empowers you to create truly personalized frozen masterpieces!
Tips for Achieving the Perfect Texture
Mastering the Creamy Dream: Achieving the perfect ice cream texture hinges on a few crucial details. Ensure your base is thoroughly chilled before churning – this is paramount for small ice crystals and a smooth consistency. Avoid overfilling the bowl; leave ample space for expansion during freezing.
Churning time varies, but generally, aim for 20-30 minutes. Don’t be alarmed if the mixture appears soft-serve like initially; it will firm up further in the freezer. For a denser texture, consider adding a stabilizer like guar gum. Conversely, for a lighter, fluffier result, increase the cream content. Remember, homemade ice cream tends to be softer than store-bought varieties, so a brief hardening period in the freezer is often beneficial.