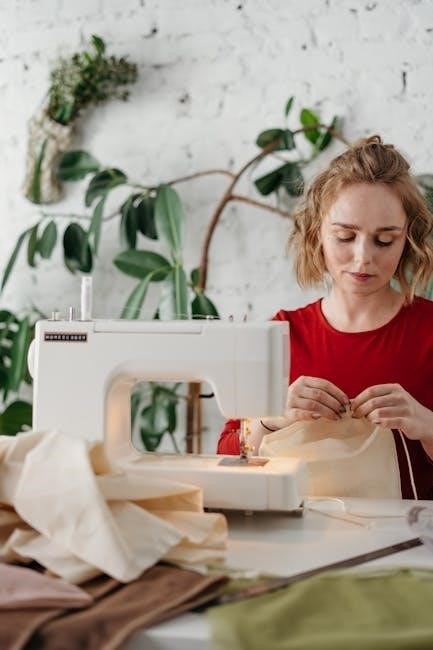
Fashion sewing is a creative art, blending technique with design to craft unique garments. It’s about more than just stitches; it’s about realizing your style!
Learning fashion sewing empowers you to customize wardrobes, repair clothing, and express individuality through textile artistry, saving money and reducing waste.
What is Fashion Sewing?
Fashion sewing transcends basic mending; it’s the art of constructing garments from patterns, utilizing diverse fabrics and techniques to achieve a desired aesthetic. It involves understanding fabric behavior, mastering stitch types – like the essential zigzag stitch for stretchy materials – and meticulously crafting seams for both durability and visual appeal.
Unlike simply assembling pre-cut pieces, fashion sewing demands a holistic approach, encompassing design interpretation, precise cutting, and skillful execution. It’s about creating clothing that fits well, looks polished, and reflects personal style. From simple alterations to complex designs with details like bound buttonholes and added pockets, fashion sewing is a versatile skill.
Why Learn Fashion Sewing?
Learning fashion sewing unlocks a world of creative possibilities, allowing for personalized wardrobes and a departure from mass-produced clothing. It fosters self-reliance, enabling repairs and alterations, extending the life of cherished garments and reducing textile waste – a sustainable practice.
Beyond practicality, sewing cultivates patience, precision, and problem-solving skills. It’s a rewarding hobby that empowers you to translate sketches into tangible creations, adding unique details like decorative stitching and appliqués. Mastering techniques like installing zippers and understanding fabric structure elevates projects, resulting in high-quality, fashionable pieces.
Essential Tools and Equipment
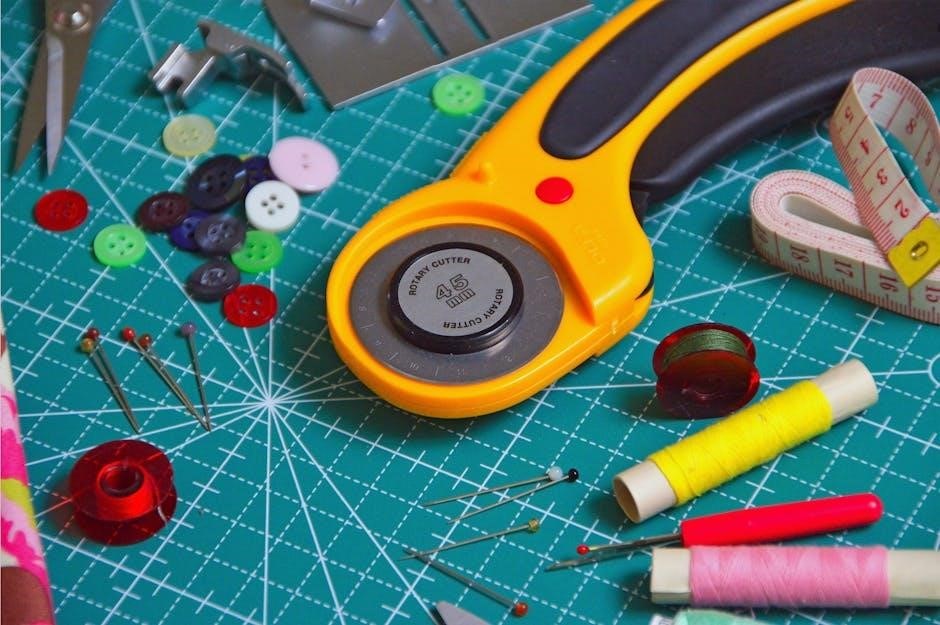
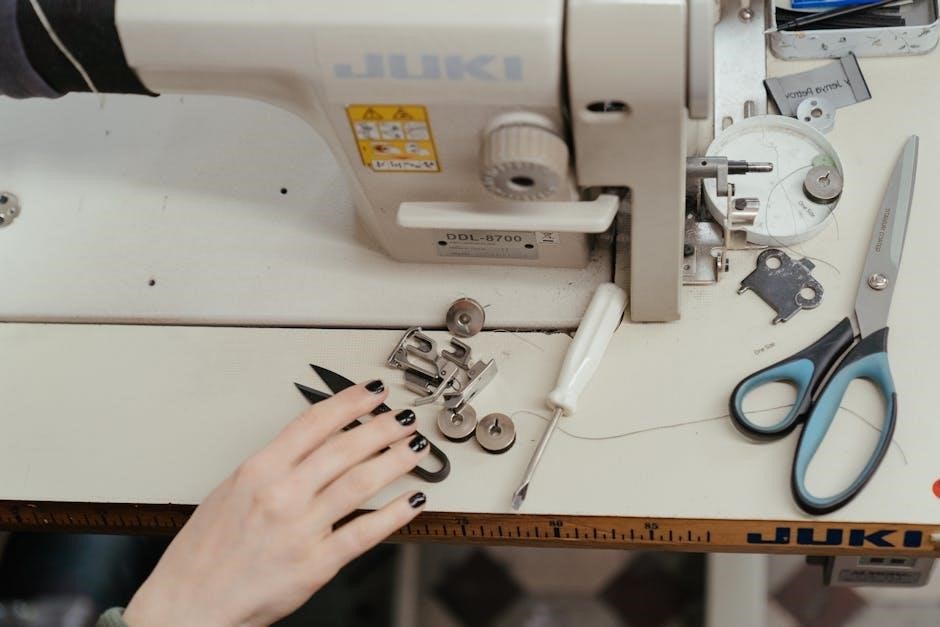
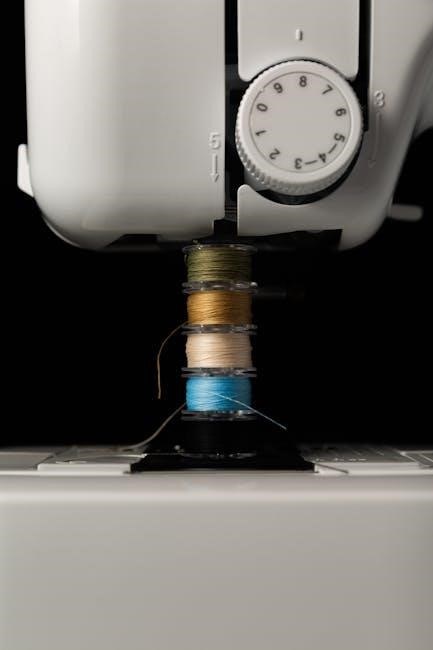
Successful fashion sewing requires quality tools: a sewing machine, hand needles, threads, sharp scissors, and rotary cutters for precise fabric manipulation.
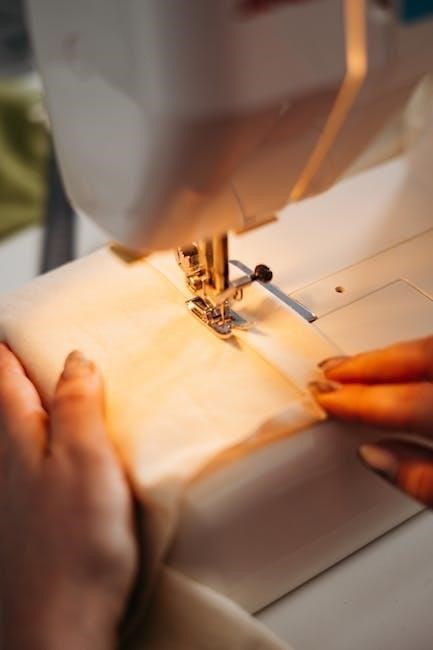
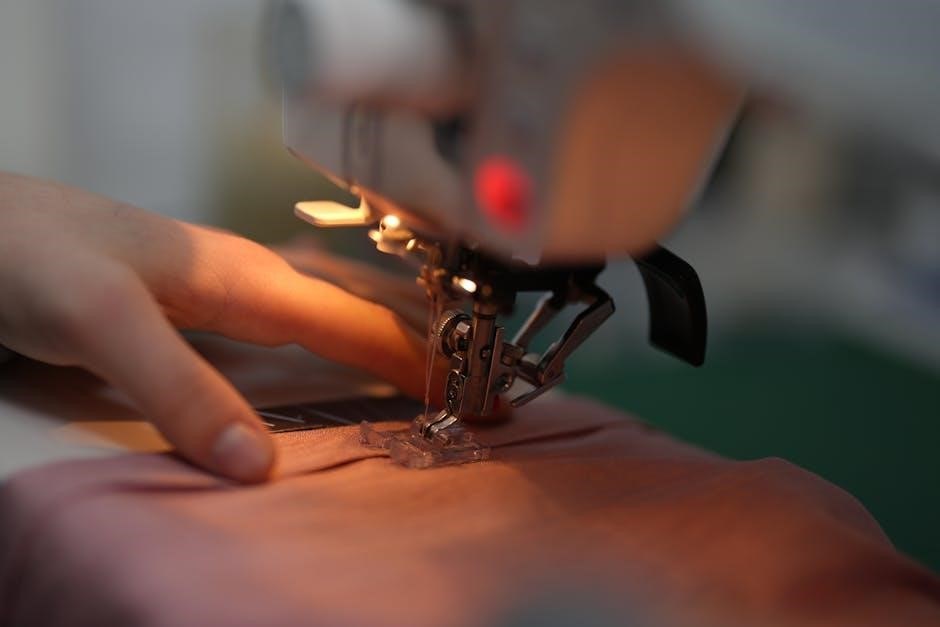
Sewing Machine Basics
Understanding your sewing machine is fundamental. Begin with threading – both the upper thread and the bobbin – following your machine’s manual carefully. Practice straight stitching on scrap fabric, adjusting stitch length and width.
Familiarize yourself with essential parts like the presser foot, needle plate, and tension dials. Learn to troubleshoot common issues like thread bunching or skipped stitches. Mastering basic machine functions unlocks a world of sewing possibilities.
Different machines offer varying features, but the core principles remain consistent. Consistent practice builds confidence and control, leading to cleaner, more professional results in your fashion projects.
Hand Sewing Needles and Threads
Hand sewing remains vital, even with a machine. Different needle types suit various fabrics – sharps for woven, ballpoints for knits. Thread weight matters; finer threads for lightweight fabrics, heavier for durable seams.
Common stitches include the running stitch for gathering, backstitch for strength, and slip stitch for invisible hems. Mastering a thread shank is crucial for secure button attachment, preventing strain on the fabric.
A well-stocked kit includes needles, thread in essential colors, a thimble, and a seam ripper. Hand sewing complements machine work, enabling detailed embellishments and precise alterations.
Cutting Tools: Scissors and Rotary Cutters
Precise cutting is fundamental to successful sewing. Fabric scissors, dedicated solely to fabric, are essential for clean, accurate cuts. Paper scissors dull fabric edges, so keep them separate! Rotary cutters, paired with a cutting mat and ruler, excel at straight lines and multiple layers.
Sharpness is key; dull blades distort fabric. Invest in quality tools and regular sharpening. Pattern scissors are smaller for intricate curves. Accuracy during cutting directly impacts garment fit and appearance.
Always cut on a flat, stable surface. Following pattern markings precisely ensures a professional finish, minimizing alterations later in the sewing process.
Understanding Fabrics for Fashion
Fabric selection dictates a garment’s drape, texture, and durability. Knowing woven versus knit structures, grainlines, and appropriate choices for projects is crucial.
Woven vs. Knit Fabrics
Woven fabrics, constructed by interlacing two sets of yarns at right angles, generally don’t stretch and offer stability – think cotton poplin or denim. They’re ideal for structured garments like tailored jackets and crisp shirts.
Knit fabrics, created by interlocking loops of yarn, possess inherent stretch and a softer feel. Jersey, rib knit, and fleece fall into this category, perfect for comfortable, flowing designs like t-shirts and dresses.
Understanding this fundamental difference impacts pattern selection and sewing techniques. Wovens require finished edges to prevent fraying, while knits often benefit from stretch stitches like a zigzag.
Fabric Grain and its Importance
Fabric grain refers to the direction the woven or knitted fibers run, significantly impacting a garment’s drape, fit, and durability. The grainline, lengthwise grain, crosswise grain, and bias grain each behave differently.
Cutting fabric with the grain ensures consistent stretch (in knits) or prevents distortion (in wovens). Ignoring grainlines can lead to twisting, pulling, or uneven hemlines – compromising the final look.
Always align pattern pieces with the specified grainline indicated on the pattern. Mastering grain understanding is crucial for achieving a professional, well-fitting garment, enhancing both its appearance and longevity.
Choosing the Right Fabric for Your Project
Selecting the correct fabric is paramount for successful fashion sewing. Consider the garment’s intended use, desired drape, and required durability. A flowing dress demands a different fabric than a structured jacket.
Woven fabrics like cotton or linen are ideal for crisp shapes, while knits offer stretch and comfort. Think about weight – lightweight fabrics for summer, heavier ones for winter.
Don’t underestimate the impact of fiber content; silk feels luxurious, polyester is wrinkle-resistant. Matching fabric to pattern recommendations ensures optimal results and a beautifully finished piece.
Basic Sewing Techniques
Mastering fundamental techniques like seam allowances, zigzag stitches for edge finishing, and topstitching elevates projects. These skills build a strong foundation for success!
Seam Allowances and Types
Seam allowances are the distance between the raw edge of the fabric and the stitching line, crucial for garment strength and fit. Common allowances range from 1/4 inch to 5/8 inch, depending on the fabric and project.
Different seam types serve varied purposes. A plain seam is the most basic, ideal for durable construction. French seams enclose raw edges for a clean finish, perfect for delicate fabrics. Flat-felled seams are strong and neat, often used in jeans. Understanding these variations allows for professional-looking results, ensuring seams are both functional and aesthetically pleasing, contributing significantly to a garment’s overall quality and appearance.
Zigzag Stitch and its Applications
The zigzag stitch is a versatile tool in fashion sewing, extending beyond simple seam finishing. It’s essential for preventing fraying on raw edges, particularly with knit fabrics that stretch and unravel easily. This stitch allows for flexibility, accommodating fabric movement without breaking.
Beyond edge finishing, the zigzag stitch is used for applying elastic, creating decorative elements, and even mimicking embroidery. It’s invaluable when working with stretch fabrics, ensuring seams remain secure during wear. Mastering the zigzag stitch unlocks a range of possibilities, enhancing both the durability and aesthetic appeal of your sewn creations.
Topstitching for a Professional Finish
Topstitching elevates a garment from homemade to high-end, adding both strength and a polished aesthetic. This technique involves stitching on the right side of the fabric, creating a visible line that defines design details and reinforces seams. It’s crucial for achieving a professional look in fashion design.
Using a slightly heavier thread and a longer stitch length enhances the topstitching’s impact. Consistent, even topstitching demonstrates skill and attention to detail. It’s a key element in creating durable, well-constructed garments that stand the test of time, showcasing quality craftsmanship.
Pattern Reading and Preparation
Pattern reading unlocks garment construction, demanding understanding of symbols and markings. Accurate cutting and transferring these markings are vital for a successful project.
Understanding Pattern Symbols
Decoding pattern symbols is fundamental to successful sewing. These aren’t arbitrary marks; they’re a precise language guiding construction. Grainlines indicate fabric orientation, crucial for drape and fit. Notches, small triangular markings, ensure correct alignment of pattern pieces during sewing. Darts, indicated by wedge-shaped lines, shape the garment to the body’s curves.
Understanding buttonhole and button placement markings is also essential. Symbols denote fold lines, easing, and cutting lines. Pattern companies utilize standardized symbols, though a pattern’s key or legend always clarifies their specific meanings. Mastering these symbols transforms a confusing sheet of paper into a blueprint for a beautifully constructed garment, ensuring accuracy and a professional finish.
Cutting Fabric Accurately
Precise fabric cutting is paramount for garment fit and appearance. Laying fabric on a flat surface, following the grainline, is the first step. Utilize sharp scissors or a rotary cutter with a mat for clean edges. Pin pattern pieces securely, ensuring they lie flat and follow the fabric’s weave. Cut outside the pattern line initially, then refine for accuracy.
Accurate cutting minimizes errors during sewing. Consider using pattern weights instead of pins to avoid distorting delicate fabrics. Double-check all markings are transferred before cutting. A well-cut garment is half-finished, laying the foundation for a polished, professional result. Sloppy cutting leads to fitting issues and a less refined final product.
Transferring Pattern Markings
Accurate pattern markings are crucial for successful garment construction. These markings – darts, notches, buttonhole placements – guide sewing and ensure proper alignment. Several methods exist for transferring them: tracing paper, tailor’s chalk, or specialized marking pens. Choose a method appropriate for your fabric type; test on a scrap first!
Notches indicate where pattern pieces join, vital for matching seams. Darts shape the fabric to fit the body’s curves. Carefully transfer all markings before cutting the fabric, if possible, to avoid distortion. Clear, precise markings minimize errors and contribute to a professional finish. Don’t skip this step – it’s essential!
Advanced Sewing Techniques
Mastering advanced techniques like installing zippers, creating bound buttonholes, and utilizing linings elevates your sewing, adding professional structure and refined details.
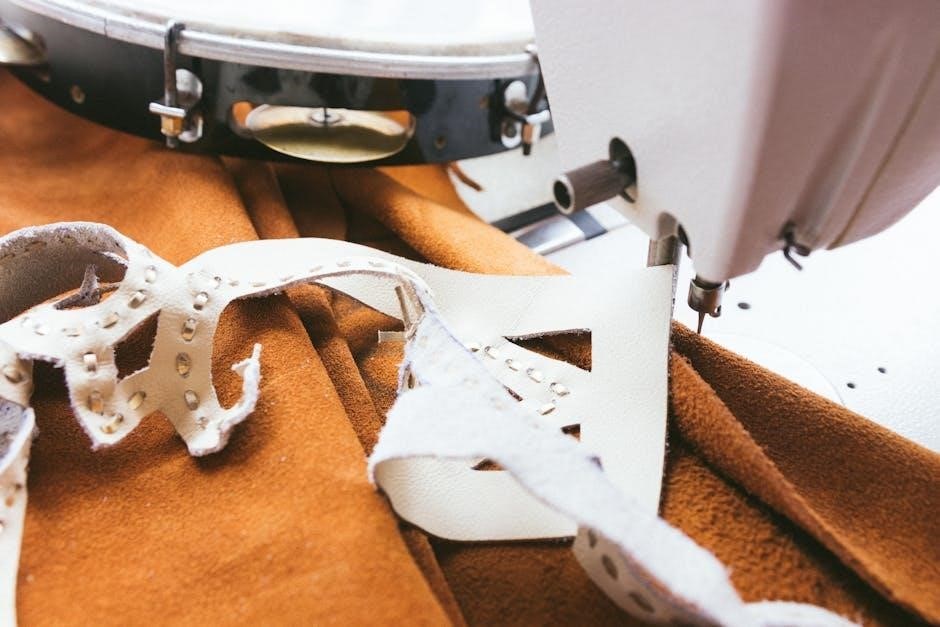
Installing Zippers
Zippers are essential closures, demanding precision for a polished finish. Several methods exist, including the centered, lapped, and invisible zipper applications, each suited for different garment styles and fabric weights.
Begin by preparing the fabric with interfacing for stability. Accurate marking of the zipper placement is crucial, followed by carefully stitching the zipper tape to the garment pieces. Remember to use the correct zipper foot for close stitching.
Practice makes perfect! Mastering zipper installation unlocks a world of garment possibilities, allowing for professional-looking closures in skirts, dresses, and jackets. Don’t be afraid to experiment with different zipper types and techniques to find what works best for your projects.
Bound Buttonholes
Bound buttonholes offer a refined, durable finish, elevating garment quality. Unlike machine-made buttonholes, they utilize fabric strips to encase the opening, creating a clean and professional look. This technique requires patience and precision, but the results are worth the effort.
Begin by creating precise markings for the buttonhole placement. Carefully apply the binding fabric, ensuring neat corners and smooth curves. Secure the binding with stitching, then cut open the buttonhole opening.
Claire Shaeffer emphasizes that details like bound buttonholes contribute significantly to a garment’s overall quality. Mastering this skill demonstrates a commitment to craftsmanship and elevates your sewing projects.
Linings and Interfacing for Structure
Linings and interfacing are crucial for achieving a professional finish and enhancing garment structure. Linings provide comfort, prevent stretching, and conceal inner construction details. Interfacing adds stability to areas like collars, cuffs, and button plackets, preventing distortion and maintaining shape.
Selecting the right weight of interfacing is key; heavier fabrics require more substantial support. Carefully fuse or baste interfacing to the appropriate fabric pieces before assembling the garment.
As Claire Shaeffer notes, the fashion fabric is often just along for the ride – the supporting layers are equally vital for a polished, well-constructed piece.

Fitting and Alterations
Achieving a perfect fit requires accurate measurements and understanding common alteration techniques. Tailoring ensures garments flatter your unique body shape and provide comfort.
Taking Accurate Measurements

Precise measurements are the cornerstone of successful garment construction and alterations. Begin by using a flexible measuring tape, ensuring it lies flat against the body without being too tight. Key measurements include bust, waist, hips, shoulder width, and arm length.
It’s best to have a friend assist for accuracy, especially with back measurements. Wear the type of undergarments you’d typically wear with the finished garment. Record all measurements carefully, noting any discrepancies. Consistent measurement taking is crucial; double-check each value before proceeding.
Understanding body shape variations is also important – measurements are a starting point, not a rigid rule.
Common Alteration Techniques
Alterations breathe new life into garments, ensuring a perfect fit. Common adjustments include taking in or letting out seams at the side seams for waist or hip adjustments. Hemming pants or skirts to the desired length is frequently needed, often utilizing a blind hem stitch for a clean finish.
Shoulder adjustments can refine the garment’s drape, while shortening sleeves offers a customized look. Darts can be adjusted or added to refine the fit through the bust or waist. Remember to always ease alterations gradually, preserving the garment’s original design.
Careful seam ripping and pressing are essential for professional results.
Achieving a Perfect Fit
A perfect fit elevates a garment from good to exceptional. Start with accurate measurements – bust, waist, hips, and length – and compare them to pattern sizing. Muslin mock-ups, or toiles, are invaluable for testing fit before cutting into your fashion fabric. Pay attention to the garment’s drape and how it moves with your body.
Common fit issues include gaping at the bust, pulling at the shoulders, or tightness across the hips. Address these through strategic alterations, adjusting darts, seams, or adding fullness where needed. Don’t be afraid to try on the garment repeatedly during the process!

Design Details and Embellishments
Pockets, decorative stitching, and appliqué add personality and functionality. Notions enhance style, while thoughtful details transform a simple garment into a unique creation.
Adding Pockets
Pockets are incredibly versatile design elements, offering both practical functionality and aesthetic appeal to any garment. There are numerous pocket styles to explore, from simple patch pockets to more complex in-seam, welt, or flap pockets. Consider the garment’s overall design when choosing a pocket style – a delicate dress might benefit from subtle in-seam pockets, while sturdy pants could accommodate larger patch pockets.
Proper pocket placement is crucial for both appearance and usability. Reinforcing pocket openings with interfacing prevents stretching and ensures durability. Accurate cutting and precise stitching are essential for a clean, professional finish. Don’t underestimate the power of a well-placed pocket to elevate your sewing projects!
Decorative Stitching and Appliqué
Decorative stitching and appliqué are fantastic ways to personalize your fashion sewing projects, adding unique flair and artistic expression. Modern sewing machines offer a wide array of decorative stitches, perfect for embellishing seams, hems, or creating standalone designs. Experiment with different stitch patterns and thread colors to achieve diverse effects.
Appliqué involves attaching fabric shapes onto a base fabric, allowing for intricate designs and personalized motifs. Secure appliqué edges with satin stitch or blanket stitch for a polished look. These techniques transform simple garments into wearable art, showcasing creativity and skill.
Using Notions for Style and Function
Notions – buttons, zippers, trims, and more – are essential components in fashion sewing, enhancing both the aesthetic and functionality of garments. Selecting the right notions elevates a project, adding professional polish and personalized details. Consider the fabric weight and garment style when choosing zippers and buttons for optimal performance.
Beyond practicality, notions offer stylistic opportunities. Decorative buttons, unique trims, and thoughtfully chosen closures can transform a simple design. Mastering notion application, like installing zippers correctly, is crucial for a high-quality finish, as highlighted in comprehensive sewing guides.